Authentication and Mongoose Models - Due Wednesday, April 4th, by 11PM
Overview
Description
Login, Registration, and Multiple Models
Create a link aggregator site (like reddit, hacker news, etc.) that supports user registration and login… along with the ability to post articles (links).
Registering or logging in will create an authenticated session that contains all of the logged in user's information. Some elements on pages will only appear when a user is logged in. Some pages will redirect to login if a user arrives unauthenticated.
Goals
- use
bcrypt.jsto salt and hash a password and to compare a hash to a plain text password - use the slides on authentication to implement login and registration
- use express-session to store user data / an authenticated session
- use embedded or related documents to model users and posted articles
- extract path components to determine what data to use to render a page
⚠️⚠️⚠️ WARNING ⚠️⚠️⚠️
This homework is for learning purposes only; do not use it for authentication on a deployed site
- our application will only be served locally, and consequently, it will not be served over an encrypted connection … and - related - cookies aren't set to secure
- it will allow case sensitive usernames
- it encourages the use of multiple nested callbacks instead of promises and / or async await
- not all errors accounted for or handled gracefully
- system level errors and user errors may not be distinguishable
- some error messaging may reveal too much information
- user interaction and error messaging will be minimal (for example, successful login should redirect to page that required login)
- some error messages reveal will info about the existence of a user
- our session secret will be in version control
Features
- register a new account
- login using an existing account
- add a new article
- view all posted articles
- show a single article's details
- prevent / allow access to certain ui elements or pages based on authenticated status
You'll have 5 pages and 3 forms:
- / - lists all articles
- /register - register form
- /login - login form
- /article/add - add new article form
- /article/:slug - detail page for a specific article
Example Interaction
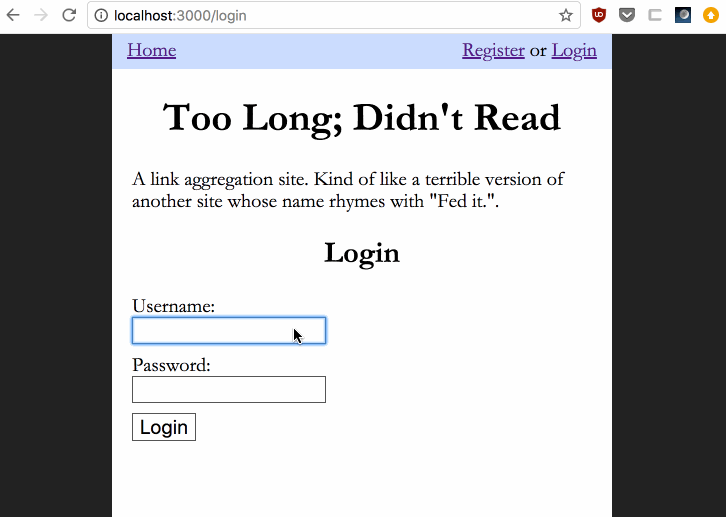
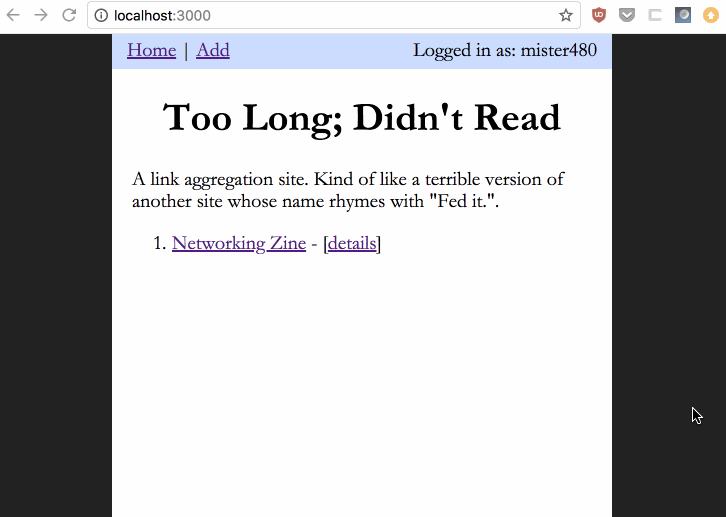
Here's what it looks like to login, add a new article, and view the link and details page:.
Submission Process
You will be given access to a private repository on GitHub. The repository will have a partially built Express application. The final version of your assignment should be in GitHub:
- Push your changes to the homework repository on GitHub.
- Add the URL of the repository to your assignment submission in NYU Classes.
Make at Least 4 Commits
- Commit multiple times throughout your development process.
- Make at least 4 separate commits - (for example, one option may be to make one commit per part in the homework).
Part 1 - Setup and Authentication Functions
Starting Project
Your repository should have the following files and directories.
├── package.json
├── src
│   ├── app.js
│   ├── auth.js
│   ├── db.js
│   ├── public
│   │   └── css
│   └── views
│       ├── article-add.hbs
│       ├── login.hbs
│       ├── register.hbs
└── test
    ├── mock-user.js
    └── test-auth.js
Add the following:
.gitignore- ignorenode_modulesand any other files that you would like to keep out of your repository (varies depending on your OS and editor… for example, if you're on vim on MacOS, you may want to ignore.swpfiles and.DS_Storeetc.).eslintrc.js/.eslintrc.json- you can use a previous configuration for this
Dependencies
The following modules are already listed in package.json and configured in app.js … so simply run npm install in the project root
expresshbsexpress-session- for session managementmongoose- for database accessbcryptjs- module for salting, hashing and comparing passwordsmongoose-url-slugs- plugin for autogenerating slugs
Your app is configured to listen on port 3000. Do not change this.
About bcrypt.js
bcrypt.js is a JavaScript implementation of password hashing function called (you guessed it!) bcrypt. We'll use it for login and registration. The result of using bcrypt contains both the hash and the salt! Check out the details in the first section of the wikipedia article and the diagram below illustrating the output of bcrypt:
$2a$10$N9qo8uLOickgx2ZMRZoMyeIjZAgcfl7p92ldGxad68LJZdL17lhWy
|_____||____________________||_____________________________|
   |             |                          |
   |             |                          +-- hash
   |             |
   |             +-- salt
   |
   +-- algorithm and cost factor
Check out how to use bcrypt.js.
Database Setup
- in
src/db.js…. - using mongoose, create two schemas:
UserSchema- it should have the following fields (all
String, and all required):username- user name used for login and public displayemail- user's emailpassword- the combined salt and hash * username should be a unique field, so set as{type: String, unique: true, required: true}* typically hash and salt should be stored in separate fields, but because we're usingbcrypta single field is adequate for both
- it should have the following fields (all
ArticleSchema- it should have the following fields (all
String, validation is your discretion)titleurldescription
- if you use embedded documents, you can skip using mongoose-url-slugs, and create slugs on your own
- sadly, it looks like sub docs aren't supported with mongoose-url-slugs (embedded documents won't work)
- …mainly because the plugin only works correctly when save is explicitly called (which doesn't happen when dealing with embedded documents)
- soooo…. instead, manually create a slug field (in your schema), and set it to the lowercase version of the title, replacing spaces with dashes (whenever a new article is created)
- use
mongoose-url-slugsto add a slug to uniquely identify each article:- this plugin will autogenerate a
slugfield (no need to explicitly add it to your schema) - a slug is a string that serves as a short, human readable name
- usually contains dashes to separate words, and a number suffix
- for example,
this-is-a-slug requirethe module:const URLSlugs = require('mongoose-url-slugs');- use the plugin by adding this code:
<your schema name>plugin(URLSlugs('<what properties your slug should consist of>')); - this should go before the model is registered </code></pre>
- this plugin will autogenerate a
- it should have the following fields (all
- finally, you must associate users and articles by using embedded or related documents:
- if relating documents, add a
User's id toArticleSchema - if embedding, perhaps adding an
ArrayofArticleobjects toUserSchemawould work - which one would be easier to use to list all of the articles posted by everyone on the home page, without user info?
- if relating documents, add a
- don't forget to register your models:
mongoose.model('User', UserSchema);mongoose.model('Article', ArticleSchema);
- your db.js is configured to connect to
hw06:mongoose.connect('mongodb://localhost/hw06');
Create Helper Functions
Create the following functions in a module, src/auth.js:
registerloginstartAuthenticatedSession
You'll use these functions in your express application to implement a login and registration page.
Warning: the following functions will contain many levels ofnested callbacks!
- we haven't covered promises yet, but if you want to remove nesting, using promises is one solution (though you'll have to research this on your own): both
mongooseandbcryptprovide promises (instead of callbacks) as part of their api - another way of dealing with this is wrapping some functionality in a function, but if you do this, you'll need to write a function that takes a callback!
register
register(username, email, password, errorCallback, successCallback)
Parameters:
username: usernameemail: emailpassword: plain text passworderrorCallback: function to call if an error occurserrorCallback(errObj)errObjwill have a key called message that contains an error message
successCallback: function to call if registration workssuccessCallback(userObject)userObjectis the object that represents the newly saved user
Return:
- no return value (instead, calls callback functions,
errorCallbackorsuccessCallback)
Description:
- when you encounter any errors as you run through the registration process:
- log the error to the console (server)
- call the
errorCallbackpassing in an error object containing a key calledmessageand a value of a string describing the error that occurred (this gives the caller the ability to pass in a function that handles the error - for example, rendering a template with an error message) - some errors will require specific strings to be in the
messageproperty of the error object, while others are your discretion (read the instructions and run the tests for details)
- check the length of the username and password passed in; they should both be greater than or equal to 8
- if either the username or password does not meet this requirement, call the
errorCallbackfunction with an object containing a key calledmessageand value ofUSERNAME PASSWORD TOO SHORT - check if the user already exists (case sensitive check is ok)
- remember to pull out your
Usermodel by usingconst User = mongoose.model('User'); - use
User.findOne((err, result, count) => { })to check if the user already exists- you can check the object with
if(result)to determine if aUserobject was returned
- you can check the object with
- or use
User.find((err, result, count) => { })… the- you can check if the length of the resulting
Arrayis greater than 0
- you can check if the length of the resulting
- remember to pull out your
- if the user already exists, call the
errorCallbackfunction with an object containing a key calledmessagewith the value,USERNAME ALREADY EXISTS - if the user doesn't exist yet, then it's ok to go ahead and create a new user…
- salt and hash the password using the
bcryptjsmodule- check out the documentation on the bcrypt module
- do not use the sync calls (use the async version of bcrypt)
- auto generate a hash and a salt:
// you can use a default value of 10 for salt rounds
bcrypt.hash(myPlaintextPassword, saltRounds, function(err, hash) {
    // do more stuff here!
});
- notice the
hashparameter in the callback above; it actually contains both the hash and the salt - now we have everything we need to create a new user
- instantiate a new
Userobject - set the
usernameandemailto whatever was passed in as arguments, and thepasswordshould be set to the salt and hash generated - call
save - if the
savesucceeds, call thesuccessCallbackfunction with the newly saved user - otherwise call the
errorCallbackwith an object that contains the key,message, and a generic error message,DOCUMENT SAVE ERROR, as the value
- instantiate a new
- check that your function works by:
- running the unit tests,
mocha test/test-auth.js(comment out all tests except for registration related ones), to check for:- a user object being passed to the success callback
- the user object having the same name and email as the original arguments passed in to the
registerfunction - the password hash in the user object being the same as the hashed version of the original password passed in to the
registerfunction - the error callback being called if a duplicate user is found (
USERNAME ALREADY EXISTS) - the error callback being called if a save issue occurred (
DOCUMENT SAVE ERROR)
- writing a small script to test if running the function actually creates a user in the database!
require('../src/db.js');
const auth = require('../src/auth.js');
auth.register('testtest', 'test@test.test', 'testtest',
  function(err) {console.log(err);},
  function(user) {console.log(user);}
);
- running the unit tests,
Example Usage:
function success(newUser) {
  // start an authenticated session and redirect to another page
}
function error(err) {
  // render a template containing an error message
}
auth.register(req.body.username, req.body.email, req.body.password, error, success);
login
login(username, password, errorCallback, successCallback)
Parameters:
username: usernamepassword: plain text passworderrorCallback: function to call if an error occurserrorCallback(errObj)errObjwill have a key called message that contains an error message
successCallback: function to call if login is successfulsuccessCallback(userObject)userObjectis the object that represents the newly saved user
Return:
- no return value (instead, calls callback functions,
errorCallbackorsuccessCallback)
Description:
- when you encounter any errors as you run through the login process:
- log the error to the console (server)
- call the
errorCallbackpassing in an error object containing a key calledmessageand a value of a string describing the error that occurred (this gives the caller the ability to pass in a function that handles the error - for example, rendering a template with an error message) - some errors will require specific strings to be in the
messageproperty of the error object, while others are your discretion (read the instructions and run the tests for details)
- find the user with username that was passed in
User.findOne({username: username}, (err, user, count) => { if (!err && user) { // compare with form password! } }); - if the user doesn't exist, call the
errorCallbackfunction with an object containing amessagefield that has the valueUSER NOT FOUND - if the user exists… then check if the password entered matches the password in the database
- the password in the database is salted and hashed… and contains the salt
- so a simple compare with
===is not adequate - salt and hash the password and compare with the hash stored in the database
- use the function,
bcrypt.compareto do this (see the docs:bcrypt.compare(password, user.password, (err, passwordMatch) => { // regenerate session if passwordMatch is true }); - note that
passwordMatchwithin the callback will be either true or false, signifying whether or not the salted and hashed version of the incoming password matches the one stored in the database
- once the match is verified, call the
successCallbackfunction with the user that was found - check that your function works by:
- running the unit tests,
mocha test/test-auth.js(comment out all tests except for registration and login related ones), to check for:- the user object being passed to the
successCallbackwhen a login attempt works - the following values for the
messageproperty on the error object passed to theerrorCallback:PASSWORDS DO NOT MATCHandUSER NOT FOUND
- the user object being passed to the
- writing a small script to test if running the function succeeds in logging a user in (that is, confirm that the success callback is called)
require('../src/db.js');
const auth = require('../src/auth.js');
// assuming the user, testtest was already registered previously
auth.login('testtest', 'testtest',
  function(err) {console.log(err);},
  function(user) {console.log(user);}
);
- running the unit tests,
Example Usage:
function success(newUser) {
  // successfully logged in!
  // start an authenticated session and redirect to another page
}
function error(err) {
  // render a template containing an error message
}
auth.login(req.body.username, req.body.password, error, success);
startAuthenticatedSession
startAuthenticatedSession(req, user, callback)
Parameters:
req: an express Request object that contains a session variableuser: the user data to store in the sessioncallback: the callback to call after a new session has been createdcallback(err)- the callback only has a single parameter,err
Return:
- no return value (instead, calls
callbackfunction)
Description:
- regenerate a session id
- use
req.session.regenerateto do this (see the docs)
- use
- add the user object passed in to the session; it should minimally contain
usernameand_id, but other other properties (like email) can also be present - test your code by running
mocha test/test-auth.js(you can uncomment all commented out tests from previous runs)
Example Usage:
 // assuming that user is the user retrieved from the database
req.session.regenerate((err) => {
  if (!err) {
    req.session.username = user;
  } else {
	// log out errorcall callback with error
  }
});
Additional Notes:
Once startAuthenticatedSession is called, you can:
- check if someone is logged in by looking at the user object in req.session (
if(req.session.user.username)) - add the user object to every context object for every template by using this middleware:
- use
res.locals(see express docs) to do this:// add req.session.user to every context object for templates app.use((req, res, next) => { // now you can use {{user}} in your template! res.locals.user = req.session.user; next(); }); - in any template (or even in
layout.hbs), you can use the following to conditionally display ui elements based on authenticated status:{{#if user}} <h1>something that can only be seen if logged in</h1> {{/if user}}
- use
- finally, to retrieve a username from the session, use:
req.session.user.usernmae
Part 2 - Layout, Homepage, Registration and Login
In this part, you'll implement the following pages:
/- home- '/register` - registration form
- '/login` - login form
The following routes should be supported:
GET /GET /registerPOST /registerGET /loginPOST /login
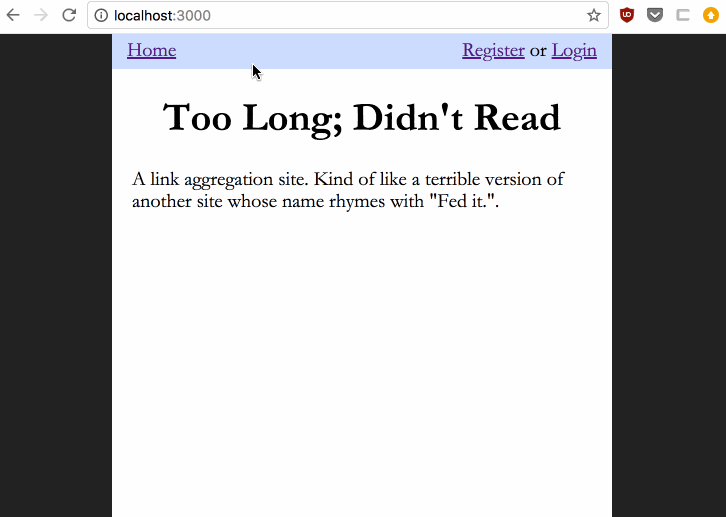
Layout and Homepage
Create a Layout File
In views/layout.hbs, add a header that contains the following information:
- if the user is logged in:
)* the user's username
- a link to
/article/add(to be implemented in part 3)
- a link to
- if the user is not logged in:
- links to:
/login/register
- the link to add an article should not appear!
- links to:
- for both logged in and non-logged in users:
- a link to home,
/
- a link to home,
Create a Homepage
/ should show the header implemented above. In part 3, this page will be used to display data from the database.
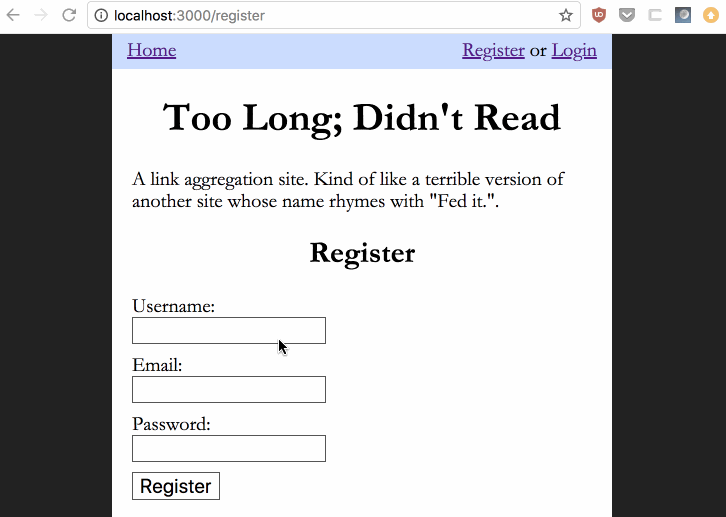
Registration Overview
Registration should allow a user to create a new account and immediately start a new authenticated session. To do this, follow these steps:
- show a registration form
- after submitting the form, salt and hash the password using bcrypt
- save the username and salt/hash combination
- regenerate the session (create a new session id)
- add some information, such as the username, to the session
- redirect to home,
/, if registration is successful
Steps 2 through 5 are handled using the register function in the auth module that you implemented in Part 1.
Step 6 should be implemented by passing a success callback function to register
There are two routes for registration:
GET /register- to display the formPOST /register- to process the form input
GET /register Implementation
- find the route for
GET /registerinapp.js - it should render a template,
register.hbsthat contains a form (register.hbsshould already exist in yourviewsfolder) - the form in
register.hbswill…POSTto/register- (that is, when you press the submit button, a POST request will be made to
/register)
- if there is a registration error,
register.hbscan be re-rendered with a message showing the error above the form
POST /register Implementation
- find the route for
POST /registerinapp.js - call your
registerfunction using the data from the POST request's body (provided by the form that the user filled out) - pass two functions, error and success callbacks, to your call to
register
success callback
- the success callback is only called if the registration works
- so it can assume that the new user now exists
- …and consequently, it can start an authenticated session for the new user using the
startAuthenticatedSessionfunction from theauthimplemented above - in turn, once an authenticated session is started, its callback should redirect to home (`/')
- here's what the resulting interaction might look like:
error callback
- if , the registration does not work, then rerender the register template with an error
- to do this, the error callback should use the response object to call
render, and the context should supply an error message - minimally, the following errors should be shown
- password length too short
- user already exists
- all other errors can simply display a generic error message
- see below for examples of registration errors:
- password or username length too short

- user already exists
- password or username length too short
Registration Testing
- in your browser, got to your registration page
- attempt to register a user
- verify that you are redirected to the homepage
- use the mongo commandline client to check that you have user documents with username and password filled in
Login Overview
Login should allow a user to authenticate using a username and password. To do this, follow these steps:
- show a login form
- search the database for the username specified in the login form
- after finding the user, salt and hash the incoming password and compare with the password in the database by using
bcrypt.compare - if the passwords match then start a new authenticated session
- redirect to the home page
Steps 2 through 4 are handled by the login function in the auth module implemnted in a previous part.
Step 5 should be implemented by passing a success callback function to login
There are two routes for login:
GET /login- to display the formPOST /login- to process the form input
GET /login Implementation
- find the route for
GET /logininapp.js - it should render a template,
login.hbsthat contains a form (login.hbsshould already exist in yourviewsfolder) - the form in
login.hbswill…POSTto/login- (that is, when you press the submit button, a POST request will be made to
/login)
- if there is a login error,
login.hbscan be re-rendered with a message showing the error above the form
POST /login Implementation
Handle the data POSTed by the login form…
- find the route for
POST /logininapp.js - call your
loginfunction using the data from the POST request's body (provided by the login form that the user filled out) - pass two functions, error and success callbacks, to your call to
login
success callback
- the success callback is only called if the login works
- consequently, it can start an authenticated session for the logged in user using the
startAuthenticatedSessionfunction from theauthimplemented earlier - in turn, once an authenticated session is started, its callback should redirect to home (`/')
- here's what the resulting interaction might look like:

error callback
- if , the login does not work, then re-render the login template with an error
- to do this, the error callback should use the response object to call
render, and the context should supply an error message - minimally, the following errors should be shown
- user does not exist
- passwords do not match
- all other errors can simply display a generic error message
- see below for examples of login errors:
- user does not exist
- passwords to not match
- user does not exist
Part 3 - Adding and Displaying Articles
Adding Articles
There are two routes for adding an article:
GET /article/add- to display the formPOST /article/add- to process the form input
GET /article/add Implementation
- make sure that only logged in users can reach this url:
- check
req.session.user - redirect to
/loginif the user is not logged in
- check
- find the route for
GET /article/addinapp.js - it should render a template,
article-add.hbsthat contains a form (login.hbsshould already exist in yourviewsfolder) - the form in
article-add.hbswill…POSTto/article/add- (that is, when you press the submit button, a POST request will be made to
/article/add)
- it has the following fields:
title- the title of the articleurl- the link to the articledescription- a short description of the article
- the following fields will be determined by your application
slug- the unique, human-readable identifier for this article- if you're using related documents,
user- the user id associated with this article (if you're using embedded documents, you will find the logged in user in the database and add this article to it)
POST /article/add Implementation
- make sure that only logged in users can reach this url:
- check
req.session.user - redirect to
/loginif the user is not logged in
- check
- create a new Article and associate it with a user
- if you used related documents
- remember to bring in your
Articlemodel:const Article = mongoose.model('Article'); - you'll have to add the user id of the logged in user (this can be found in the
_idproperty of the session data,req.session.user, that you have for the currently logged in user)
- remember to bring in your
- if you used embedded documents
- you'll have find the user that created the article in the database
- and push a new article into its list of embedded documents
- if you used related documents
- in either case if the article / user is saved successfully, redirect to the home page (
/), and if there's an error, re-render thearticle-add.hbsand display an error message - note that the
slugfield should automatically be added for you by themongoose-url-slugsplugin - the entire interaction should look like this:
Testing
- go to
/article/add - make sure that you are redirected to login (if you're not logged in)
- register or login to your site
- go back to
/article/add - submit the form
- using the commandline client, check that a new article has been added!
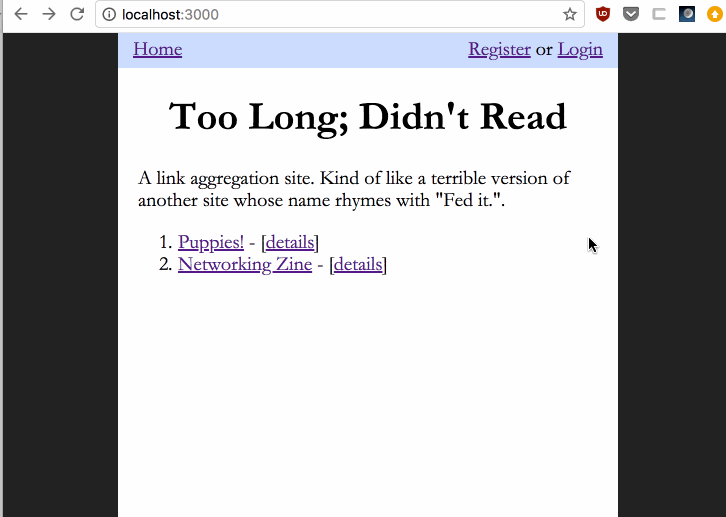
Displaying All Articles
The homepage should display all of the articles added by users.
- go back to your route handler and template for your home page,
/ - query the database for all articles posted, and drop the result into the context object when rendering the template.
- in the template, display the title of the article…
- make the title a link to the url of the article
- for example, if
titleisfooandurlishttp://bar.baz… then the markup should be: <a href="http://bar.baz/>foo</a>
- for example, if
- additionally, link to a detail page for the article
/article/the-article-slug; the link text should be "details"- for example, if the
slugfield of the article isqux-corge… then the markup should be: <a href="/article/qux-corge">details</a>… note that the slug part would have to be filled in by a template variable
- for example, if the
Displaying an Article's Details
The detail page, /article/the-article-slug, should show all of the fields of an aritcle, including:
- title
- url (this should actually link to the url displayed)
- username of the user that added the article
- desription
Displaying All Articles and Article Details Example

Extra Credit (5 points)
- create a route that shows only the articles added by a certain user
- its url should be /:username
- display the user's username on top of the page
- a list of articles should go underneath the username
- display the title and make it a link to the url