Creating a Tiny Web Framework, Due Monday, Feb 19th by 11PM Wednesday, Feb 21st by 11PM
⚠️⚠️⚠️NO GRACE PERIOD⚠️⚠️⚠️
Extended due to length of homework.
Overview
Description
There are two major parts to this assignment:
- create a simple web server and website by using the
netmodule - move the functionality from part 1 into classes so that they your code can be reused as a library for making web apps without having to deal with low-level
netmodule code
By the end of both parts, you'll have a toy web framework that allows a developer to write simple web applications.
Again, both parts will be built off of and run from node's built-in TCP server (from the net module).
You can only use the following two modules for this assignment →
net- a module for creating TCP servers and clientsfs- a module for file system related tasks, such as reading and writing files
You can't use the http module… or install additional frameworks, such as express
Submission Process
You will be given access to a private repository on GitHub. It will contain:
- stub source files in the
srcdirectory - some testing assets in the
publicfolder - unit tests in
test - linting files
.eslintrc, etc. - you'll have to create your own
package.json
- Push your changes to the homework repository on GitHub.
- Commits later than the deadline will not be included in grading
(4 points) Make at Least 4 Commits
- Commit multiple times throughout your development process.
- Make at least 3 separate commits - (for example, one option may be to make one commit per part in the homework).
Part 1 - An Introduction
In this part, you'll familiarize yourself with the net module by creating a simple server that responds to http requests. You'll use events and callback functions to handle a new client connection, data arriving on a socket from a client, and a connection being closed.
Work with the following files:
src/intro.js- your web server (run this file to serve your site)src/webutils.js- a module that contains helper functions
You'll start off by writing some helper functions. Then at the end of this part, you should have an application that uses those helper functions to respond to the following requests:
GET /- responds with a page that contains links to other pages and a formGET /such/stylish- responds with a page that includes a stylesheetGET /css/base.css- responds with a stylesheetGET /picsplz- responds with a page that includes an imageGET /img/animal.jpg- responds with an image of your favorite animalGET /showanimage- responds with a redirect topicsplzPOST /- responds with the body of the post request as plain text- A request that isn't
GETorPOST- a405is sent back saying that the method is not allowed - A request that is a
GETorPOSTbut does not have a matching path - a404is sent back saying that the resource/page was not found
Before starting, make sure to review the course materials on the net module and creating tcp/ip servers:
- check out the slides on the
netmodule, paying close attention to the the last slide. - go over the notes from previous classes
- lastly, make sure that you can write back a valid http response by reviewing::
Create helper functions
Start by creating some helper functions in webutils.js to ease development. Export these function so that You can use them in intro.js. Minimally, implement the following functions (of course, you can create more functions, as the functions will only help with a subset of the part 1's requirements).
getExtension(fileName)
Parameters:
fileName- a string representing the name of the file
Return:
- the extension of the file in lowercase as a
String
Description:
Extracts the extension of a file name and normalizes it to lowercase. You can assume that everything after the last dot in a fil name is the extension. If there is no dot, then the extension is empty string. Hint: split or path.extname may help implement this function.
Example usage:
const ext1 = getExtension('foo.jpg'); // ext1 --> jpg
const ext2 = getExtension('FOO.JPG'); // ext2 --> jpg
const ext3 = getExtension('foo.bar.jpg'); // ext3 --> jpg
const ext4 = getExtension('foo'); // ext4 --> empty string
sendTextFile(fileName, sock):
Parameters:
fileName- a string representing the name of the file (relative to a directory calledpublicwithin the root of your project directory)- example
/css/base.csswould read the filePROJECT_ROOT/public/css/base.css`
- example
sock- a socket object to write data to
Return:
- no return value
Description:
Sends back an http response with the data from the text file specified as the response body (along with appropriate headers and status line). The sock object will be used to write the http response back to the client.
Use fs.readFile to read the data from the file from the path passed in:
- the path,
fileNamewill be relative to a folder calledpublicin your project's root directory- the built-in variable,
__dirnamecontains the directory that your program is running from - for example, if you're running your project from
/Users/foo/abc123-homework03/src, then__dirnamewill contain that path - you can assume that your program,
intro.jswill be run directly from thesrcfolder in your project's root - consequently, to read
fileNamefrompublic, you'll have to use a combination of__dirnameand..to go up one directory to your project root - for example, to construct the absolute path to the file, concatenate or use path.join from the
pathmodule to put together:__dirname,..,public, andfileName
- the built-in variable,
- you can assume that the file you are reading is
utf8, so use that as the 2nd argument tofs.readFile - in the callback to
fs.readFileuse thesocketobject that was provided as an argument to the original function to write out a response.
The response should be a valid http response:
- start with the status line (using the appropriate status code)
- include any headers
- hint:
Content-Typemay be useful - see the mdn page on MIME types for possible values for
Content-Type - use the appropriate value for the extension of the text file being sent
- you can assume that we will only be serving stylesheets, html and plain text
- creating a mapping from extension to
MIMEtype may be helpful
- hint:
- make sure that there's an empty line between the headers and the body of the response (remember
\r\n\r\nseparates the body from the status line and headers) - use the text from the file as the response body
- write all of this out to the client using the
socketobject passed in - and finally, use the
socketobject to end the connection
If any error occurs while reading the file, don't send back the contents of the file. Instead… send back a response that:
- let's the client know there was an error
- use an appropriate status code and description in the status line of your response
- include a plain text body that describes the status code
Example usage:
sendTextFile('/css/base.css', sock);

// reads /path/to/project/public/css/base.css
// the resulting response should be something like (with new lines as \r\n\r\n):
// HTTP/1.1 200 OK
// Content-Type: text/css
//
// h1 {color: red;}
sendImage(fileName, sock):
Parameters:
fileName- a string representing the name of the filesock- a socket object to write data to
Return:
- no return value
Description:
This function is similar to sendTextFile described above, but instead of reading a plain text file, it will read image data and send it as the response body. The requirements and specifications for sendImage differ from sendTextFile in the following ways:
- because an image is being read, omit the second argument, encoding, or set it to an empty object for
fs.readFileso that the raw buffer is given instead of an encoded string:fs.readFile('/img/foo.jpg', (err, data) => {});fs.readFile('/img/foo.jpg', {}, (err, data) => {});
- just like
sendTextFile, you'll have to send back the appropriate http response status line and headers… so that means you have to send the rightContent-Type - this function should support:
jpg,jpeg,gif, andpng(again, check out the mdn article on MIME Types - IMPORTANT: when sending a response, you must
writethe response status line, headers and empty line to thesocketobject first, and then, only afterwards,writeout the raw buffer image data (essentially, you'll be callingwritetwice)… DO NOT CONVERT THE IMAGE DATA TO A STRING- also check out the class notes for additional examples
Testing Functions
Once your finished with your implementation above, you can export, test and try using your new functions.
Export the functions using module.exports, and try running the tests in test/webutils-test.js
- make sure that
mochais installed as in previous assignments - install dev dependencies to run tests: npm install --save-dev chai sinon mocha-sinon (you can ignore any unmet peer dependency warnings)
mocha test/webutils-test.js
Create Pages
Now that you have some helper functions, you can create a web server and put together a few pages! Open up src/intro.js to:
- create a simple web server
- check out the echo server example
- make sure your server is running on port 8080
- the web server should respond to http requests (see the pages / requests that your server should support after this set of instructions)
- review the sample web server code from the course site
- also check out the class notes for additional examples
- of course, bring in your
webutils.jsto help with this (again, you can create more helper functions in addition to the ones required from the instructions above) - if you are using
sendTextFileorsendImage, then make sure to drop your files in thepublicfolder of your project root
- to run your server, change to the
srcdirectory in your project root and runnode intro.js(note that your terminal will look like its "frozen", but it's really just waiting for requests). - use the following to test your server
curl -i localhost:8080/path/to/pageto test your server.- enter the url in your browser
- To shutdown your server, CTRL + c in your terminal…
The pages / requests that your web server should handle include:
A Homepage With Links
- modify your server so that it responds to
GET / - it should give back an html document
- the document should contain links to the following pahts
/such/stylish/picsplz/showanimage
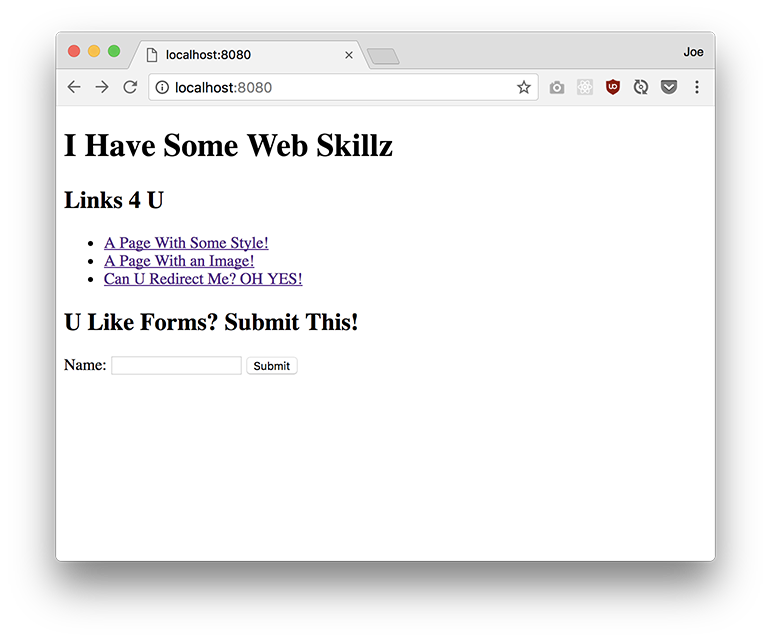
- it should also contain this form (which will be used later to create a POST request):
<form method="POST" action=""> Name: <input type='text' name='name'> <input type="submit"> </form> - you can use one of your helper functions from
webutils.jsto implement this, or manuallywriteout an http response with html as the body - if you're not getting the response you expect (your browser doesn't show the page, only shows plain text, etc.), check out the troubleshooting section below
- example (your text does not have to match exactly, but there should be three links and a form):
A Styled Page
- modify your server so that it responds to:
GET /such/stylishGET /css/base.css
/such/stylishshould respond with an html document that includes a link tag that includes a css file- the css file that it should include is
/css/base.css /css/base.cssshould respond with a stylesheet- add styles to
/css/base.css - minimally, you stylesheet should change the colors of the text so that it's not the default color, black
- you can add any other styles that you like
- add styles to
- you can use one of your helper functions from
webutils.jsto implement this, or manuallywriteout an http response with the appropriate body (html and css respectively) - example (note that the styles are from
/css/base.css, but the page is/such/stylish)… you can style this page any way you like, but minimally, change the colors of the text (you don't have to add borders or a background):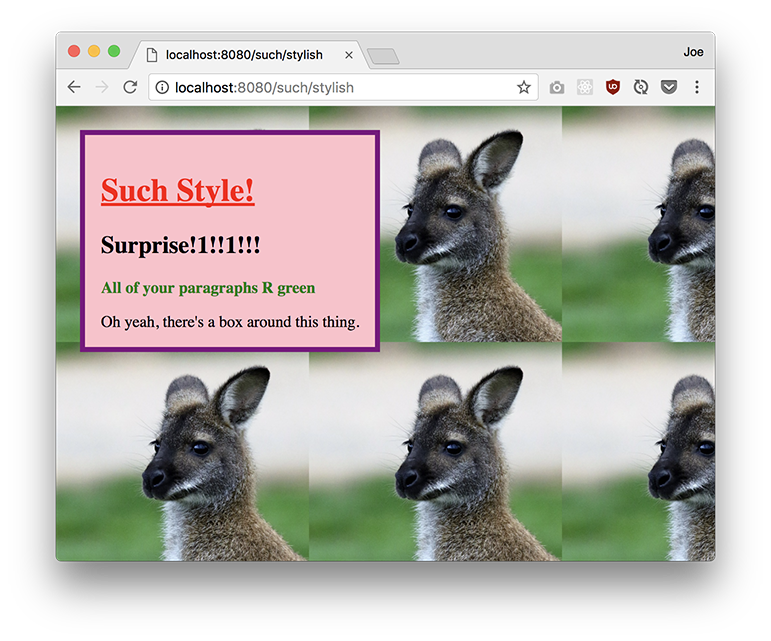
A Page with an Image
- modify your server so that it responds to:
GET /picsplzGET /img/animal.jpg
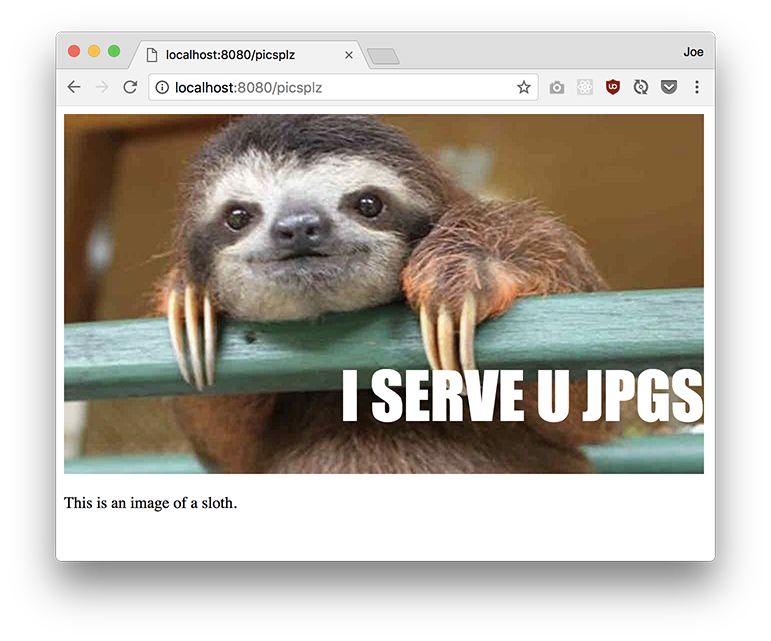
/picsplzshould respond with an html document that includes an img tag- includes some text describing the image
- the image that it should bring in is
/img/animal.jpg /img/animal.jpgresponds with an image (jpg) of your favorite animal- you can use one of your helper functions from
webutils.jsto implement this, or manuallywriteout an http response with the appropriate body (html and an image, jpg, respectively) - if your image doesn't work, check out the troubleshooting section below
- example:
A Redirect
- modify your server so that it responds to:
GET /showanimage - this will result in a permanent redirect to
/picsplz - make sure to use the correct status code and headers
- the body can just be plain text with a message specifying that a permanent redirect is in place
- to test:
- go to
/showanimagewith curl - the response should have the appropriate status code and headers
- use your browser to go to
/showanimage - the url bar should go to
/picsplz - use incognito mode or clear your cache to make sure that the redirect is not cached when testing
- go to
- you'll have to manually
writeout an http response andendthe connection to implement a redirect as response… or add a helper function towebutils.jsthat does this - example (note that the initial response should be a 301, at which point your browser is redirected to
picsplz, which is what will appear in the url bar):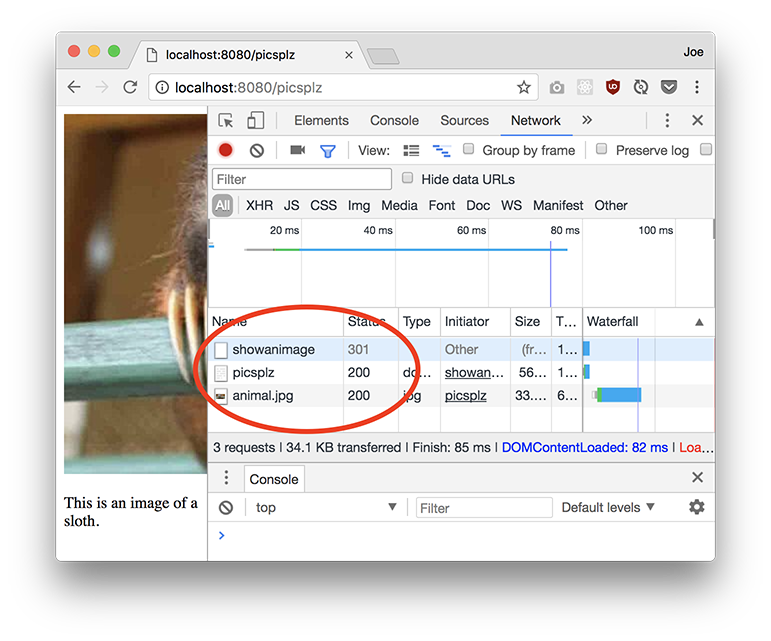
Handling a POST Request
- modify your server so that it responds to:
POST / - it should respond with a plain text document that shows the body of the original POST request (which means that you should parse out the body of the request that you received)
- of course, make sure you send back the appropriate status code for a successful response
- along with any necessary headers
- to test:
- submit the form from
/by filling in the text field and clicking the submit button - this should result in a
POSTrequest from your browser - you should see a plain text result that containts name=whatever_you_typed
- alternatively, use
curl -i localhost:8080 -d name=whatever_you_typedto initiate a POST request from curl
- submit the form from
- you'll have to manually
writeout an http response andendthe connection to implement this… make sure to include the body that was parsed out of the request as part of the response! example (entering data in the form in/should display the form data that was entered):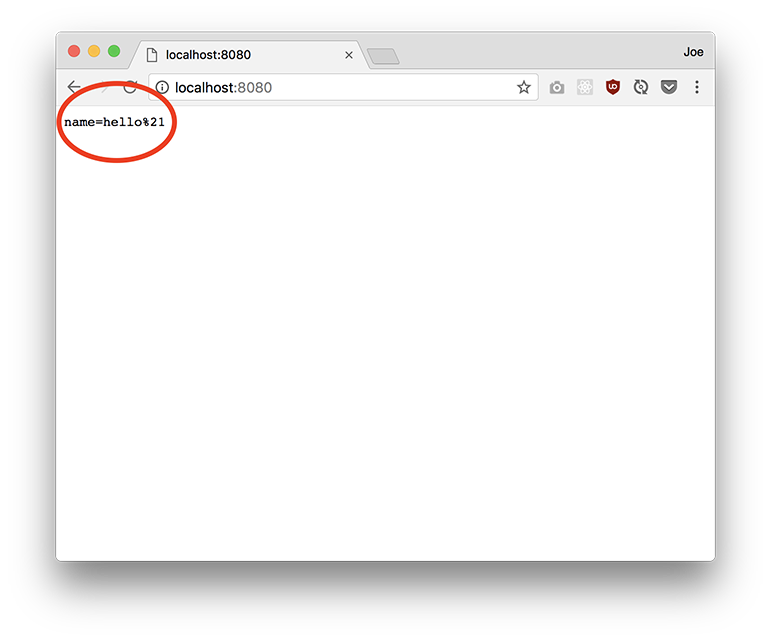
Handling Bad Requests
Finally, handle the following error conditions:
- if a request has a method that's other than
GETorPOST, send back a405with a plain text body saying that the method is not allowed - if a request is a
GETorPOST, but it does not have a matching path, send back a404with a plain text body saying that the page was not found - both of these can be implemented by manually using
writeandendon the socket object to write back the appropriate response… or you can write a method that does this in your helper functions module - an example of a 405 using
ncto send a request that's notGETorPOST:
- an example of a 404 using curl:
Everything Together
Once you've finished up all of the paths specified, an example interaction may look like this:
Troubleshooting
- If your browser doesn't show anything, and it looks like it's waiting for a response, make sure you're calling
sock.end. - If html is showing up as text (that is, you see the tags / mark-up in the page itself), double check that you've set the content type correctly.
- If you see an error in the terminal window that runs your server that says:
Error: This socket has been ended by the other party, it likely means thatsock.endwas called more than once (you can only end a connection once! …so callingsock.endmultiple times on the same socket will result in an error) - If your browser does not display the resource and instead shows an error that says empty or invalid response, then that means that a valid http response is not being sent back or no data was sent back (check the format of your response by printing it out, check for calls to
writeandendwhere appropriate) - if an image is broken:
- it's likely an issue with content type or reading the image as binary data - make sure that the head is written first, then the data of the body sent afterwards
- or perhaps not having two \r\n's between the headers and the body
- or it could be inadvertently converting the body into a string by writing the headers and the body all at once
- or inadvertently adding extra data into the body
Part 2 - Request, Response, and App Classes… and a Small Site!
Although we abstracted out some of common tasks into function in part 1 of this assignment, there was still a lot of manual work that needed to be done, and it felt like an incomplete API for creating web applications.
Let's use some JavaScript language features to create a nicer library for creating web applications. We'll create this framework in src/webframework.js
About the Framework
Your framework (webframework.js), will be built off of node's net module. It'll use the net module to create a TCP server that will allow connections from clients. The code that you'll write will handle an incoming http request from a client by parsing the http request, determining what do based on the request, and finally sending back an http response. You'll do this by creating these objects (you can create more objects, but these 3 must be present):
Request- an object that represents an http requestResponse- an object that represents an http response… and has the ability to actually send back a response to the clientApp- represents your web application; takes incoming requests and determines what to do based on path, method, etc. …
You can use the objects that you create to write simple web applications. Here are some example of how you might use webframework.js. Again, you are making the library / objects / module that makes the following possible:
- Create a new web application
const App = require('./miniWeb.js').App; const app = new App(); - Serve the contents of the file in
$PROJECT_ROOT/html/index.htmlwhen a request for/is received- here's the code that you would use:
app.get('/', function(req, res) {
  res.sendFile('/html/index.html');
});
- here's the code that you would use:
- Serve the string
"just some text"as plain text (text/plain)by manually setting aContent-Typeheader, status code, and response body …when a request for the path,/just/text, is receivedapp.get('/just/text', function(req, res) { // set header res.setHeader('Content-Type', 'text/plain'); // return a 200 with body, "just some text" res.send(200, 'just some text!'); }); - Send back a temporary redirect when a client requests the path,
/goneapp.get('/gone', function(req, res) { // set the status code and location of a redirect res.redirect(301, '/just/text'); }); - Bind your application / web server to port 8080 on localhost
app.listen(8080, '127.0.0.1');
Building the Framework
In webframework.js…
- create a
Requestobject to encapsulate http requests - create a
Responseobject to encapsulate http responses; this object will be able to:- send http responses back using a socket object
- read files from the file system to send back
- create an app object that encapsulates your server…
- add application level functionality, such as routing
- use your objects to create a simple site!
You'll build off of your experience from part 1 by refactoring your code and encapsulating the functionality that you previously created in classes and methods.
Create a Request Class
In this section, you'll fully implement a Request object. You'll then conditionally serve up different content based on the path specified by the request. The Request object represents an http request. It can take an http request as a string, parse out information about that request and expose that information as properties (such as method, path, and headers). It assumes HTTP/1.1
Create the Request class by implementing the following in webframework.js:
Constructor
Request(httpRequest) - creates a new request object based on the string passed in.
let s = ''
s += 'GET /foo.html HTTP/1.1\r\n';   // request line
s += 'Host: localhost:8080\r\n';     // headers
s += '\r\n\r\n';                     // empty line to mark the boundary between the header and body

const req = new Request(s);
The string passed in will be parsed into the properties shown below. You can assume that you will always receive a valid http request
Properties
path- the path requested (for example,/foo/bar/baz.html)method- the http verb (for example,GETorPOST)headers- an object that has header names as property names and header values as property values (for example,{"Host": "localhost:8080", "User-Agent": "Mozilla/5.0 ..."})body- the body of the request (for example,username=foo)
Note that our Request object will assume HTTP/1.1, so it's not required to keep version as a property (though you can if you want!).
Methods
toString- returns a string representation of the request object as a valid http request (essentially taking its properties and creating a request - or another way of looking at it is recreating the original string passed in to the constructor)
You can add additional properties and methods as needed.
Example Usage
let s = ''
s += 'GET /foo.html HTTP/1.1\r\n';   // request line
s += 'Host: localhost:8080\r\n'; // headers
s += '\r\n\r\n';                     /

const req = new Request(s);

console.log(req.path);
// --> /foo.html

console.log(req.method);
// --> GET

console.log(req.headers);
// --> {'Host': 'localhost:8080' }

console.log(req.body);
// --> ''
// the body is empty in this case ^^^
Testing / Using the Request Object
Once your finished with your implementation above, you can export, test and try using your new Request object.
- Export the object using
module.exports, and try running the tests in test/webframework-test.js (comment out the other tests) … run from withintestfolder- make sure that
mochais installed as in the previous part - install dev dependencies to run tests: npm install --save-dev chai sinon mocha-sinon (you can ignore any unmet peer dependency warnings)
mocha test/webframework-test.js
- make sure that
- This request object can be used to parse the binary data that is passeed in to the callback function
someCallbackinsock.on('data', someCallback) - Now you can use the resulting
Requestobject'smethodandpathproperties to conditionally execute codeconst req = new Request(binaryData.toString());if(req.method === 'GET' && req.path === '/foo') { }
Create a Response Class
Instead of directly calling write on thesocket object, wrap the socket up in a Response object and use that to send data to the client. Notice that all of the methods called on socket are being being called by equivalent methods on your Response object.
The Response object represents an http response, and it allows direct manipulation of the underlying socket that represents the current connection for the http request/response. It can hold data about an http response, turn that data into a valid http response… and send that data back to the client (as well as close the connection between the server and the client).
Create a Response class based on the specifications below.
- Note that it may be useful to keep an object that maps status codes to short descriptions ({"200": "OK", "404": "Not Found"})
- You can run unit tests as you work, as usual, by adding the object to
module.exports, and running the tests in test/webframework-test.js- again …
mocha test/webframework-test.js - not all methods are tested by the unit tests ⚠️️⚠️️⚠️️
- again …
Constructor
Response(socket) - creates a new response object using the socket passed in as an argument to send data to the client.
 // when a socket, named sock, receives data...
// where sock is an object that represents connection a client
const res = new Response(sock);
The constructor will set the socket instance passed in as a property on the resulting Response object. The socket will then be used to send data back to the client.
Properties
sock- the socket associated with the http responseheaders- an object that has response header names as property names and response header values as property values (for example,{"Content-Type": "text/html", "Cache-Control": "max-age=3600"})body- the body of the response (such as an html document or an image)statusCode- the status code of the http response as aNumber(for example:200)
Methods
Most of the methods in the Response either act as a proxy for socket methods (that is, you can call end on Response, which internally just calls end on its sock property) or are convenience methods for combining other Response object methods. Consequently, it would be useful to check out the slides on networking and sockets before starting. Alternatively, you can also look over the official node documentation on the net module.
setHeader(name, value)- adds a new header name and header value pair to thisResponseobject's internalheaderspropertyname- the name of the response headervalue- the value of the response header- no return value
- example usage:
res.setHeader('Content-Type', 'text/html');
write(data)- sends data to the client by calling thewritemethod on thisResponseobject's internal socket object (essentially a pass-through / proxy method to call the same method onthis.sock)data- aStringorBuffer(binary data) to be sent to the client- no return value
- note that all it does is write
datato the socket, nothing else (it doesn't close the connection or add additional data todata) - example usage:
res.write("<h2>A bit o' HTML</h2>");
end(s)- sends data and ends the connection by callings theendmethod on thisResponseobject's internal socket object (essentially a pass-through / proxy method to call the same method onthis.sock)- note that you will not be able to send any more data on a closed socket (this also implies that you cannot call end more than once for a single request/response cycle)
- also note that you should not call
sock.writeat all in this method; again, just make the same call tosock.end(which can take an argument if you want it to write data to the socket and end the connection) s- aStringorBuffer(binary data) to be sent to the client- no return value
- example usage:
res.write("some stuff");
res.end('some more stuff'); // closes connection!
send(statusCode, body)- sets the statusCode and the body of thisRequestobject, sends the valid http response to the client, and closes the connection. Essentially, it sets response properties, converts theResponseto a string uses theResponseobject'sendmethod to send the response and close the connection… all in one method call.statusCode- the status code of the http responsebody- the body of the http response- no return value
- example usage:
res.setHeader('Content-Type', 'text/html');
res.send(200, 'Hi there!');
// sends back the following http response (newlines are \r\n):
// HTTP/1.1 200 OK
// Content-Type: text/html
//
// Hi there!
// (then closes the connection)
writeHead(statusCode)- sets the statusCode, and writes everything but the body, and leaves the connection open; this is simply a combination of setting thestatusCodeproperty and callingthis.write- another way to think about it is that: it writes out all of the headers (including the status line), and after you call writeHead, you can continue writing more data, such as the body of the response with something like
write statusCode- the status code of the http response- no return value
- example usage:
res.setHeader('Content-Type', 'text/html');
res.writeHead(200);
// connection isn't closed yet! we can still write more
res.write('More stuff');
res.end('');
// sends back the following http response (newlines are \r\n):
// HTTP/1.1 200 OK
// Content-Type: text/html
//
// More stuff
- another way to think about it is that: it writes out all of the headers (including the status line), and after you call writeHead, you can continue writing more data, such as the body of the response with something like
redirect(statusCode, url)- redirects to the suppliedurlusing the suppliedstatusCode… ifstatusCodeis no given, then default to permanent redirect,301(for the redirect to work, the appropriate header must be set to the url provided!). Lastly, immediately sends response and closes connection.statusCode- (optional) the status code of the http response redirecturl- the url to redirect to- no return value
- example usage:
res.redirect(302, 'http://another.site/here'); // response is immediately sent and connection is closed // (essentially ... set statusCode and header, then this.write and this.end or just this.end) - troubleshooting:
- some browsers, such as Chrome, will cache redirects … so you'll have to…
- check with curl first to see that you're getting the right status code and headers
- check with your browser next, making sure to clear your browser cache before trying again (and perhaps use "incognito" mode)
toString()- returns a string representation of this response object that can serve as a valid http response- no arguments
- returns a string, a valid http response
- when adding a short description for status codes, use these descriptions:
200-OK301-Moved Permanently302-Found303-See Other400-Bad Request404-Not Found405-Method Not Allowed500-Internal Server Error
- example usage:
res.setHeader('Content-Type': 'text/plain');
res.statusCode = 404;
res.body = "Uh oh! No page here!"
console.log(res.toString());
// HTTP/1.1 404 Not Found
// Content-Type: 'text/plain'
//
// Uh oh! No page here!
sendFile(fileName)andhandleRead(contentType, err, data) -sendFilewill use the logic inhandleReadas part of its callback to send the file specified byfileName(which will be searched for in$PROJECT_ROOT/public`) to the client by setting the appropriate content type, writing the data from the file… and immediately closing the connection after the data is sent- this is essentially just the
sendTextFileandsendImagefunctions from part 1 combined into a single method! - implementation details for both these functions are below:
- this is essentially just the
Implementing sendFile and handleRead
These two methods will be used to send back a file in an http response:
sendFile(fileName)- determines the types of file and then attempts to read a file (this function does not return a value)handleFileRead(contentType, err, data)- used to handle the result of attempting to read a file; it'll send back an appropriate response: either a successful response with the file contents as part of the response body or a response the specifies a server error if the file was not successfully read (this function does not return a value)
To implement these methods:
- In
sendFile, search for thefileNamepassed in as an argument within thepublicfolder in the root of your project directory: determine the absolute path to the file name that's passed in by using__dirnameto find the directory of the running application… and go up one so thatpubliccan be accessed- you can pass everything to
path.join(as in the previous part) <pre>const filePath = path.join(__dirname, '..', 'public', '/html/foo.html'); // assuming OSX file system, with projects/homework03 in home directory // the above code yields: // /Users/username/projects/homework03/public/html/foo.html</pre>
- you can pass everything to
- Use the extension of the file to determine:
- if it's an image
- … and to figure out what the correct
Content-Typeshould bejpegorjpg:image/jpegpng:image/pnggif:image/gifhtml:text/htmlcss:text/csstxt:text/plain
- Call
fs.readFilewith:- the absolute path that you created
- if the file is text, then pass in an encoding (assume
utf8) as the second argument, otherwise… if the file is an image, then don't specify an encoding by omitting this argument (it's ok to rely solely on extension to determine a text file or an image file) - the last argument to
fs.readFileshould be a callback function- note that this callback should make use of the
handleReadmethod defined in the sameResponseclass assendFile
- note that this callback should make use of the
handleRead, (again, a method in theResponseobject) should take acontentType,erranddataas its arguments…- note that the callback for
fs.readFileusually accepts two arguments… and within your callback, you may want to access the instance (this) thatsendFilewas originally called on (for example, you may want to call other instance methods, such aswriteHead,end, etc.) - to solve this, you must wrap a call to
handleReadin an arrow function when passing it in as a callback tofs.readFile - using an arrow function as the callback (that calls
handleRead) will setthisappropriately and deal with the mismatch of number of arguments between the callback needed forfs.readFileandhandleRead - ⚠️⚠️⚠️READ THIS BACKGROUND MATERIAL⚠️⚠️⚠️ on using methods as callbacks and changing the number of parameters to a function/method before using the example code below
- this background material also covers bind as part of a potential solution
- however, use arrow functions instead, as shown below
- here's the code you'll need within the context of
sendFileandhandleReadmethod definitions:sendFile(fileName) { // determine contentType const contentType = 'code to determine content type goes here';
// handle read has three arguments, but readFile's callback only sends // two arguments... so wrap in an arrow function and call handleRead // with the contentType that's in scope this also has the side effect // of using the this that was within scope when the arrow function was // created (which is the correct this - the instance that sendFile was // called on) fs.readFile(filePath, readFileOptions, (err, data) => { this.handleRead(contentType, err, data) }
// ...rest of method implementation }
handleRead(contentType, err, data) { // use Response instance methods like: // this.writeHead, this.setHeader, this.end, etc. // to send back the file as the body of an http response // or send back an 500 server error if an error occurs while reading the // file }
- note that the callback for
- Call the appropriate
Responseobject methods from withinhandleReadto send back a response; note that the methods must be called in this order →- set the
Content-Typeheader - send everything but the body by calling
this.writeHead(200) - write the data that was passed in as an argument to the callback to the socket (that is, write the data from the file)
- close the connection
- why write the headers and the body separately? This avoids any issues where the binary data of the image is inadvertently converted to a string.
- (again, this mimics what you implemented in part 1, but with both functions,
sendTextFileandsendImagemerged into a single method that handles both types of tiles)
- set the
- Example Usage for
sendFile:// assuming there's a directory called public/css in your project's root... res.sendFile('/css/base.css'); // // note that the url does not have to match the name/path of the file being read!
Testing / Using the Response Object
Once your finished with your implementation above, you can export, test and try using your new Response object.
- Export the object using
module.exports, and try running the tests in test/webframework-test.js (comment out the other tests… and runmochafrom withintestfolder) - This
Responseobject can be used replace manual calls towriteandendon the socket object (since it wraps the socket object itself!) - For example:
const res = new Response(sock); // pass in a socket object…- Call to your
Responseobject'ssetHeadermethod to set the content type:res.setHeader(...) - Call to your
Responseobject'ssendmethod to send the response back with the appropriate body:res.send(200, ...); - Call to your
Responseobject'sendmethod to close the connection - etc.
- Call to your
App Object
The app object represents a web application. It's responsible for:
- accepting incoming http requests
- holding "routes" or url/path combinations (right now our framework will only support GETs)
- determining what to do based on the incoming request
- sending back a response
Number 2 and 3 are determined by the user that is writing a web application with this framework. That is, they specify what routes are present … and what to do when that route is matched by writing code. For example, a hello world application could be written as follows (this is what someone using your web framework would write):
const App = require('./miniWeb.js').App;
const app = new App();

app.get('/hello', function(req, res) {
    res.send(200, 'HELLO WORLD');
});

app.post('/hello', function(req, res) {
    res.send(200, 'Got a POST request');
});

app.listen(8080, '127.0.0.1');
Constructor
App() - creates a new App object and sets the connection callback function to this.handleConnection which you'll implement below … additionally, initializes its routes to empty object (see Properties section). Example usage of constructor:
const App = require('./miniWeb.js').App;
const app = new App();
Note that when you import the module, you can set a variable directly to an exported object by using dot notation. In the example above, pull out the App constructor.
The App object itself represents both a web server and the web application running on that server. Consequently, it'll hold an instance of a Server object from node's net module. See the slides or the node documentation.
When you create a server using net.createServer, it expects a callback function to be specified when a client connects to the server. That callback will be a method that you define, handleConnection. However, to have a method be passed as a callback and retain its original access to the object that it belongs to, you'll have to use bind (otherwise, this will refer to the global object). In the constructor, it'll look something like this:
// within your constructor
this.server = net.createServer(this.handleConnection.bind(this));

// the above ensures that handleConnection will have a this that refers to the
// object created by the constructor without having to call handleConnection
// as a method on the object
Properties
server- an instance of thenetmodule'sServerobjectroutes- an object that maps methods and paths to callback functions- you can set this up any way you like
- for example, you can concatenate method and path to use as a property
- or you can have nested objects, where method is a top level property… and then paths properties of a nested object under the method property
Methods
get(path, cb)- addsGETandpathto "key" intoroutes… the value of which is the callback function,cbpath- the path to respond to (that is, a valid path for the web application)callback- the function called when aGETto thispathis requested (essentially… what to do when a specific path is asked for)- the callback function will take two arguments
- a
Requestobject - a
Responseobject cb(req, res) ...
- no return value
- example usage:
app.get('/hello', function(req, res) {
 res.send(200, 'HELLO WORLD');
});
post(path, cb)- addsPOSTandpathto "key" intoroutes… the value of which is the callback function,cbpath- the path to respond to (that is, a valid path for the web application)callback- the function called when aPOSTto thispathis requested (essentially… what to do when a specific path is asked for)- the callback function will take two arguments
- a
Requestobject - a
Responseobject cb(req, res) ...
- no return value
- example usage:
app.post('/hello', function(req, res) {
 res.send(200, 'Got a POST');
});
listen(port, host)- binds the server to the givenportandhost("listens" onhost:port)port- the port number to bind tohost- the host that the server will be running on (for example, '127.0.0.1')- no return value
- example usage:
app.listen(8080, '127.0.0.1');
handleConnection(sock)- the function called when a client connects to the server… this will simply set the callback for the socket'sonmethod:sock.on('data', ...)to the function below,handleRequestDatasock- the socket representing the connection to the client (this will be supplied by the caller because this will be used as a callback function fornet.createServer)- no return value
- example usage (as a callback function for
net.createServer):
this.server = net.createServer(this.handleConnection.bind(this));handleRequestData(sock, binaryData)- the function called when the socket receives data from the client (our framework will not have a timeout, it'll just assume that once it receives data, that the data received is the entire request)… this is where most of the logic of our framework will go; it processes a request and sends back a response!sock- the socket representing the connection to the clientbinaryData- the data sent by the client- no return value
- this callback is essentially responsible for processing a request and sending back a response… it will:
- convert the incoming data to a string
- create a new
Requestobject based on that string - create a new
Response - sets a callback for when the connection is closed (the callback will be to log the response using
logResponsebelow) - determine if the request is valid by checking for a
Hostheader (it'll return a400if the request isn't valid) - look up the function to call in
this.routesby using thepathproperty from the incomingRequestobject … make sure that urls with and without a trailing slash (/) map to the same function - call that function, passing in the
RequestandResponseobjects created above as arguments - if the
pathdoesn't exist inthis.routes, then send back a404
- hints:
- note that the callback for
sock.on(data, ...)typically only takes a single argument - however, we want access to a socket object so that we can create our
Responseobject using that socket - so… to fix the arguments, when we set
handleRequestDataas a callback inhandleConnection, we'll have to use bind again (or arrow functions):
- note that the callback for
- example usage:
<pre>
// within handleConnection... sock.on('data', this.handleRequestData.bind(this, sock)); // once again, sets this... and also sets sock so that the returned function // only takes a single argument, binaryData - example usage (as a callback function for
sock.on('data', ...)):
sock.on('data', this.handleRequestData.bind(this, sock));logResponse(req, res)- logs out the http request method and path… as well as the response status code and short message- example usage:
req- the incoming http requestres- the resulting http response- no return value
- example usage (as a callback function for
sock.on('close', ...):// when a request / response cycle is finished, then log out some info // note that we'll need to bind req and res assuming that they're available (which they should be... // ...since this goes in handleRequestData, which creates both objects) // (arrow functions will also work) sock.on('close', this.logResponse.bind(this, req, res));
Using Your Request, Response, and App Classes
Create a small site using your framework. The site should be a fan site about one of your favorite characters from a book, movie, or television show. It must adhere to the technical specifications below, but actual content is your discretion).
In a file called better.js, create a site that responds to the following requests:
GET /- a homepage that contains links to/form,/random, and/rando`GET /css/base.css- a css file linked to by every document on your site (style any way that you like, as long as it's obvious that the page is styled)GET /image1.jpg- a jpg (the path must be as specified) of your favorite characterGET /image2.gif- a gif (the path must be as specified) of your favorite characterGET /image3- an image…format does not matter, gif, jpg or png, but make sure there's no extension in the url path (the file on the file system may have an extension, though)GET /random- a page that displays a random image using animgtag; this must be an html page with no client side JavaScript… the server will generate a random image url to be displayed- this might be tricky to do by using
sendFile - so… in this case, it may be best to put together a string containing the html… and changing the image
srcwith a conditional - alternatively, you can attempt to implement templating (perhaps create a separate
Responsemethod that will read the contents of a file and substitute portions of it)
- this might be tricky to do by using
GET /rando- a permanent redirect (a 301) back torandomGET /form- a page with the following form markup (note that pressing the submit button will cause aPOSTrequest to be submitted to/form:<form method="POST" action=""> <div> Character: <input type="text" name="character" value=""> </div> <div> Quote: <input type="text" name="quote" value=""> </div> <div> <input type="submit"> </div> </form>POST /form- parse the body of the incomingPOSTrequest (the body should contain the form input element names and their values) and display only the values in plain text- the form above contains a couple of text inputs,
characterandquote - when the form is submitted, it will take the values of the text inputs and combine them with the names of the inputs in the following format (assuming that
fooandbarare entered): character=foo"e=bar- note that the form input elements names and their values are joined with an equal sign,=- name and value pairs are joined with an ampersand:
& - only display the values (not the names) … in the case above, only
fooandbarwould be displayed in plain text
- the form above contains a couple of text inputs,
To create your site:
- Bring in your module and create a new
Appobject:const App = require('./webframework.js').App; const app = new App(); - Add routes as necessary…
app.get('/', function(req, res) { // ... do stuff here when a GET request to / is received }); app.post('/form', function(req, res) { // ... do stuff here when a POST request to /form is received }); - Use any mechanism you'd like to send back a response (you can use
sendFileand read files frompublic, you can just usesendto send back strings of html, etc.) … obviously, for some, like images, you'll have to use specific methods - Bind to a port and host with
listen:app.listen(8080, '127.0.0.1');
Check your work
- use curl to check status codes and headers…
- check the pages in your browser, make sure everything renders fine with/without leading and trailing slashes
- make sure your redirect actually causes your browser to redirect the right way (that is, it should coerce the browser into making another request)
- remember to check 404's
- make sure that your application is logging request/response info to the console
Here's an example of how it might all work: